This unfussy tunic is a great beginner project that comes together really quickly. It is guaranteed to become a staple in your wardrobe!

The Harper Tunic from Elizabeth Suzann is described as being ‘unfussy’ and I think that is the perfect word for it. It is minimal in it's design, simply featuring a large asymmetric patch pocket, and a slightly curved, high/low stitched hem. It is intended to be oversized and relaxed (my favourite), being not only perfect for the warmer weather, but a great layering option for those cooler days.
This mid thigh length top (or dress) will undoubtedly become a staple in your wardrobe.
A wrap-up of this review
For the purpose of this post I am simply going to refer to the brand Elizabeth Suzann in shorthand as ES.
Elizabeth Suzann (photographed below) founded her eponymous brand in 2013. The brand grew to a team of 42 as demand for her designs increased. In 2020, the company temporarily closed, citing factors such as the Covid-19 pandemic. However, Elizabeth Suzann's commitment and talent led to the reopening of the company, with operations shifting to her backyard workshop.

After scrolling through the ES website, it became obvious that sustainability is at the forefront of everything the brand does. I noticed a few key pillars that truly define what this beautiful brand stands for:
Longevity: ES creates well designed, beautiful, comfortable, and functional clothing that will be loved for years.
Natural fibres: ES is committed to working with natural and biodegradable fibres, which are dyed in beautiful calming colours. These fibres are not only kind to the environment but also to our bodies.
Local and independent: Elizabeth Suzann is involved in everything from designing, pattern making, sampling, and fitting, all of which takes place in her very own backyard workshop. She collaborates with partners in North Carolina for tasks like cutting, sewing, and packing, and the garments are then shipped from a family-owned distribution centre in the same region.
Inclusivity: Inclusiveness is evident in every aspect of the ES brand, from the photography, marketing, sizing, fit and styles.
Knowledge sharing: One distinctive feature of the ES brand is the provision of PDF sewing patterns for a variety of their designs. This strategy actively involves and educates consumers, providing a deeper insight into clothing production. It empowers individuals to make more informed choices while cultivating a heightened appreciation for the items in their wardrobes.
I strongly recommend checking out the beautiful garments, fabric, and of course sewing patterns on the ES website, and taking a look at their social media @elizsuzann, and hashtag #esmadebyme for some inspiration.
The pattern
ES patterns are available in digital format as PDF files. They can be easily purchased via the pattern page of the Elizabeth Suzann website.
Once you have purchased your pattern you will be emailed a link to download the PDF sewing pattern files. This download will provide you with access to:
A4 sewing instructions (33 pages).
A4 print at home patterns (available in full and on the fold).
A0 copy shop patterns (available in full and on the fold).
The digital download will include nested patterns* for all sizes in both the at home and copy shop pattern folders.
I usually opt to have the A0 pattern pages printed at a copy shop. This allows me to receive all available sizes in one print bundle. I can easily fold back (with a bit of clipping on the curves), the sizes I don't currently need. If I decide to make a different size in the future, it's conveniently ready to be unfolded. This, of course, depends on individual preferences.
Design


The Harper Tunic pattern includes two versions;
Short Sleeve Tunic with elbow length sleeves.
Long Sleeve Tunic with drop-shoulder, and slim fitting, bracelet length sleeves.
Both versions of this relaxed and unfussy tunic are minimal in their design, featuring;
Bias faced neckline.
An asymmetric patch pocket with top-stitching (I am noticing that pockets seem to be a signature of ES patterns, which I am all for).
Slightly curved, stitched hi/low hem finishing at the mid thigh.
Double turned, stitched sleeve hem.
The instructions

The instruction booklets included with ES patterns are unsurpassed, being the most beautifully presented and detailed I am yet to come across.
The instruction booklet for the Harper Tunic spans 33 pages, covering everything you need and more to complete the project. The instructions are detailed where they need to be, written in easy to understand language, thoughtfully organised with clear sub-headings, and each step is accompanied by a clear diagram.
What I love the most about the booklet is the “Quick start guide”. If you are a more confident sewer, this simplified guide, included at the beginning of the booklet, features only the key steps, allowing you to jump straight in.
I don't normally print the pattern instructions included with PDF patterns as I find a digital copy works just fine, and I don't like to waste paper. However, I am very tempted to print the ES instructions, keeping them as a book. They are just beautiful!
Sizing
The Harper Tunic is available in the 'OS' ('One Size') size range. This pattern spans from 'OS Minus' to 'OS Plus 3'. These sizes are specifically tailored for roomier and more relaxed styles, which are naturally that little bit more forgiving in terms of fit.
N. B. From what I read online, there is a shift away from this “one size” terminology as no one size actually fits all. Instead ES utilises the more inclusive 6-size chart, which includes XXS/XS, S/M, etc. For more on ES sizing, check out their detailed sizing page on their website.
When it comes to measuring and selecting your size, the instruction booklet includes multiple pages of detailed and user-friendly diagrams and tables. If you are after a little more guidance, the ES website provides a valuable and in-depth guide (and video) on how to measure that it well worth a look.
Fabric and notions
The Harper Tunic is recommended for light and medium weight fabrics, with no stretch. Think linen, cotton voile, silk crepe, seersucker, Tencel, and rayon (fabrics that will drape).
However, this is not to say that a heavier weight wool or blend would not create a lovely winter tunic.
To complete the tunic you will simply need matching thread.
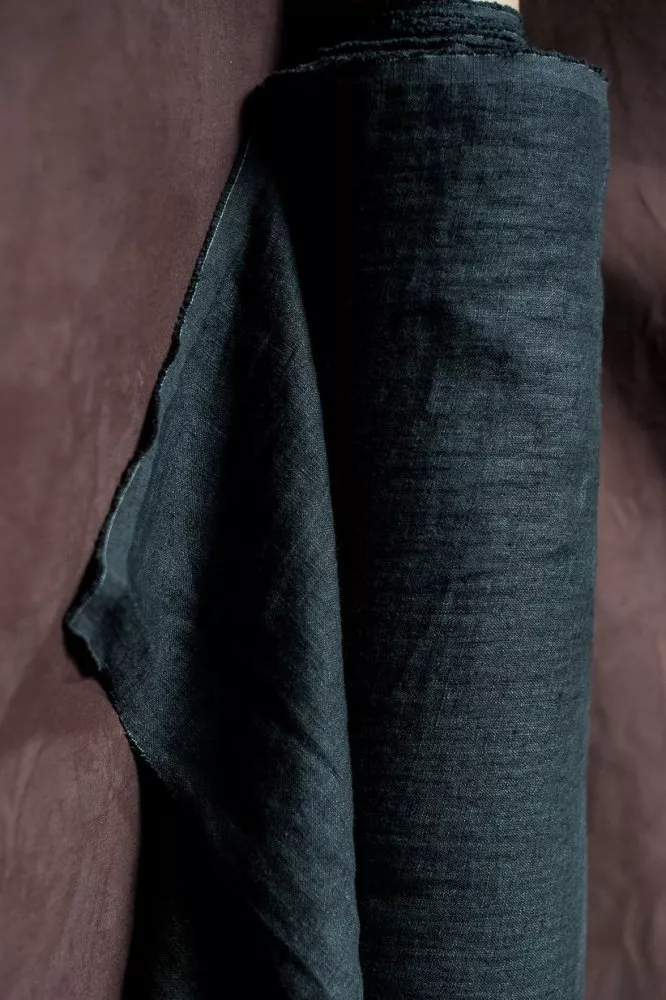
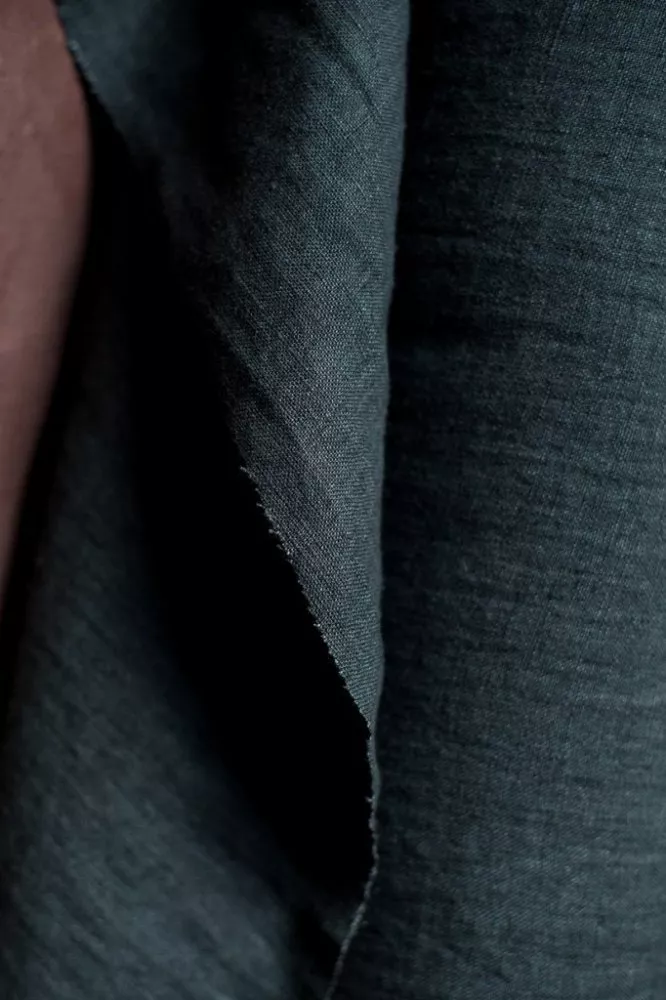
My version?! Surprise, surprise, I went with another Merchant & Mills fabric, choosing their 100% GOTS, and Oeko-Tex certified European laundered linen in Sweeps Scrim (a Jet Black). Don't be fooled by the photographs on their website (like I was). I had been overlooking this fabric for weeks because I thought it was a dark petrol colour (see images below). It really is a true Black!
I love wearing linen all year round, even here in Munich where it can get quite chilly. I simply layer my linen garments with my thermals underneath. I also love the lived in look of linen, and that you can be that little bit lazy with it sometimes.
This particular fabric forms part of Merchant & Mills' 185 linen stock range. If you have been following me, you know this is my go to linen fabric. This fabric has a lovely hand feel, washes beautifully, and is a dream to cut and sew. I knew it would perform well for this tunic, providing a beautiful amount of drape. There is a reason I keep coming back to it!
For my next Harper?! I would love to create the longer sleeve version in a more heavier weight, wintry fabric. While I choose not to buy/wear wool, I am thinking a wool or wool blend type weight.
Layout and cutting
As always, I would recommend pre-washing your fabric as per the care instructions prior to starting any cutting or sewing. For more on pre-washing your fabric, check out my article 'How to: Pre-wash your fabric'.
The pattern consists of only 5 pattern pieces per view:
Front (Short sleeve view)
Back (Short sleeve view)
Front (Long sleeve view)
Back (Long sleeve view)
Sleeve (Long sleeve view)
Pocket
Neck binding
I liked that you could select whether you printed pattern pieces on the fold or as one piece. This is the first pattern where I have encountered this and I thought it was a great option to have. For instance, if you are working with a fabric that has a pattern or nap, printing the pattern as one piece might be a good option in order to assist with correct alignment . I don't have a lot of room to layout and cut fabric so I love a piece that is cut on the fold as it takes up less room.
The layout and cutting is straightforward, fitting quite nicely within 150cm wide fabric. This pattern will also work with narrower width fabrics, with the instructions providing a variety of cutting layouts for 110-150cm wide fabrics.
If you are interested, I cut the ES Harper Tunic and the ES Clyde Jumpsuit at the same time. By cutting both patterns from the same fabric piece, I saved a significant amount of fabric. I was able to strategically manoeuvre and arrange the pattern pieces like a jigsaw puzzle. Given my inclination toward the same colour and fabric, I plan to adopt this approach again in the future.
Note: I am currently working on a ‘How to’ for more accurately gauging the amount of fabric to buy for a pattern, as if you are like me, you tend to find yourself with an annoying strip of fabric left over that just gets added to your stash . These tips will require you to have the pattern first. Stay tuned!
Fabric preparation
Once your fabric is cut out and ready to go, there is only a little prep work that I would recommend prior to commencing sewing of this tunic that may just make the sewing process that little bit easier:
Ensure you have transferred all pattern markings and notches onto your fabric. In particular, ensure you have marked the positioning of the centre front and back on both the garment and bind, hems, and patch pocket to ensure correct alignment.
Pre-press the hem of the from and the back: The tunic has a hi-low, double turned, stitched hem. The instructions suggest sewing stitching guidelines* to make the turn up easier, and I really did find that this made things easier and is a technique that I am sure will be applied to other projects.
Prepare bindings: I much prefer to have my bindings pressed and ready to go so I always make these up ahead of time. The instructions and measurements for these bindings are of course included with the sewing pattern.
Sewing
This pattern is described as beginner friendly, being suitable for all sewing levels, and I would have to agree. The pattern will have you:
Straight stitching and edge finishing seams.
Top-stitching.
Creating and attaching a bias neck facing.
Sewing double turned hems (including a hi-low hem).
Creating and attaching a patch pocket.
This garment really is a great beginner project as it gets you to practice some really common and useful sewing techniques.
The tunic came together really quickly, being easily completed within a couple of hours. It is for this reason, that I actually don’t have any photographs of the sewing process so my apologies (I will get the hang of this documenting thing one day).
The fit
As mentioned previously, this tunic is relaxed and oversized with a dropped shoulder. Therefore, it is definitely a little more forgiving when it comes to fit than other styles.
I am usually a size 6 or XS depending on the garment. Therefore, I made the size OSM (or "one size minus") for this tunic. All I can really say is that it is roomy. But it is intended to be. It really is the perfect garment for layering. I like to mix my black version with different coloured fitted long sleeve tees underneath.


I chose the view with short sleeves, and as you can see from photographs above, they finish nicely just above the elbow.
I am more on the shorter side, coming in at approximately 155cm, and while I found the length to be really nice for pairing with oversized trousers, skirts or jeans, I wouldn’t necessarily wear it as a “tunic”, finding it just that little bit too short. But, it would be straightforward to cut and spread the body of the patter, adding length if that’s the look you were after.
Personal reflection
What I loved: I particularly liked the method of stitching a guideline at the hemline. This made it so much easier to create a more precise and neat fold, especially when working with a curved hem. This was a method I surprisingly hadn't encountered before, but one that was so simple and effective I will definitely use again in future projects!
One minor issue I encountered: My only slight niggle related to the bias neck facing. I found it a little difficult to make the bias facing fit and sit nicely especially at the more “dramatic” curve of the centre front using the measurements provided. It's possible that my fabric was a factor. However, having recently faced a similar issue while making the Clyde jumpsuit, I ended up making my binding just slightly longer.
Any changes: For my next Harper Tunic I think the addition of a CB seam with top stitching detail would be a nice design feature, and would compliment the existing stitching of the pocket and edge finishes.
Glossary
Nested patterns: Refers to patterns that feature multiple sizes layered (or nested) within each other. You may see the different sizes colour coded, or more commonly indicated with different patterned lines (e.g. dashed). These differentiated lines make it easy to identify, and therefore cut or trace the desired size. When working with a PDF pattern, there will often be an option to select the size you would like printed, turning off (or making invisible) any unnecessary layers.
Stitching guidelines: Technique used to help create a curved, hi-low hem. A row of regular stitching is sewn at the first turn up (for this particular pattern that was (0.6cm). This row of stitching is then used as a guide to fold along and press. Another row of stitching is sewn using a larger stitch length (like a basting stitch), at the next turn up (for this pattern that was at 1.3cm). Again, this row of stitching is used as a guide to fold along and press. The basting stitch is then removed.
Please get in touch or leave me a comment. I would love to know if you found this pattern review helpful, or if there is something you would like me to include in these reviews in the future. Hopefully, I have also inspired you to check out the Harper Tunic pattern, and the beautiful brand that is Elizabeth Suzann.
Thanks for reading.
Emma xx
This is a personal blog. Any views or opinions contained on this site are my own. I am not affiliated with any brands, products, or organisations mentioned, and do not receive any sponsorship, payment, or other compensation for any of the content on this site.